


Stretching 101
Before You Stretch
As with getting a new piercing, it’s incredibly important to do your research before stretching any piercing. It’s ideal to familiarize yourself with some basic information, especially since stretching can be a permanent change to the body.
You’ll want to think about the size or “gauge” you want to go to then keep in mind that it is going to take time and patience to get there. When stretching, you want to go up one size at a time to avoid tearing, blow out, and to prevent your ear lobes from getting too thin.
Never skip sizes. When you stretch, you are pulling the collagen molecules, skin cells, and everything else in that immediate area apart and asking your body to produce more of these cells in order to fill the spaces you’ve created during the stretch. This takes time so it is paramount that you go at a pace that your body is comfortable with.
The piercing that you are planning to stretch should be completely healed. If it is ear lobe, we recommend letting the piercing heal for 6-8 weeks. If it is cartilage, we recommend 6 months. Keep in mind these are guidelines and will not be true for everybody or every piercing. If you are new to piercing, we encourage you to consult a piercer before you begin stretching.
It’s vital to avoid creating scar tissue by stretching too soon. If you stretch a piercing that is not completely healed (wound does not weep, the area is not red, the tissue looks healthy and exactly like the unpierced skin around the immediate area), you will create scar tissue which is much less elastic and prone to tearing.

Ways to Stretch
Tapers
Tapers are only recommended for smaller sizes. Once you get to a 0, we recommend using another method. A taper is a rod, usually about two inches in length, with a gradual increase in diameter.
You’ll put the smallest end in first and slowly push it through to the larger end. Then you can hold a plug to the end and push the taper out with it.
IMPORTANT – If there is a lot of resistance or if your skin turns white around the jewelry, DON’T keep pushing. Your ears are not yet ready to stretch and pushing the plug through could cause a tear or blow out, and possibly permanent scarring or other damage to your piercing.
Go back to the smaller size and try stretching naturally by gently pulling or tugging on the ear lobes. Try the tapers again in a week or two.
Tape
Tape can be difficult to use with smaller gauges but is one of the best options when you get to a 0 or larger. You’ll cut the tape to fit and put a layer or 2 around the tunnel or plug every few days.
Our “Stretch It!” tape is a great option as it is skin safe, non-adhesive, and only sticks to itself. Adding tape gradually stretches your ears until you are at the next size.
Weights
Weights can be worn to help with stretching. You’ll wear the weights through a pair of tunnels during the day and the added weight stretches the ears very slowly. This helps stretch your ears naturally which gives your lobes ample time to build up more collagen cells.
Remember, patience is the most important element of any stretch.
IMPORTANT – Do not use silicone to stretch. Putting the next larger size into smaller holes can cause the skin to tear by trying to stretch it too quickly. If this happens, you will have to go down to multiple sizes. Depending on how severe the tear is.

Helpful Tips for Keeping Your Ears Healthy
- Jojoba oil will be your best friend throughout the stretching process. Jojoba oil is easily absorbed into the skin, is anti-inflammatory, and anti-microbial. It is similar to the oils in our skin making it incredibly moisturizing which is just what your ears need during stretching.
This can be applied topically to your lobes and to your plugs. Put a couple of drops in your fingertips and rub into the area to moisturize your ear lobes. Do this in between stretches as well as during your stretch.
- Always wash your hands before stretching.
- Right before stretching, it can be helpful to apply a warm compress to the ears for several minutes each. You can also try putting tapers or plugs into your piercing while taking a warm shower.
- There may be a little bit of pain or discomfort as well as itching and swelling when stretching but there should never be bleeding.
- After each stretch is completely healed, give your body a minimum of 4 or more weeks to heal and regenerate the area. Time allows your body to heal completely by growing new cells and getting rid of cells it no longer needs.
- Don’t compare your stretching experience to someone else’s. Each body heals differently and there are many factors that contribute to this. Just because someone else was able to stretch at a fairly quick rate, doesn’t mean that you will be able to.
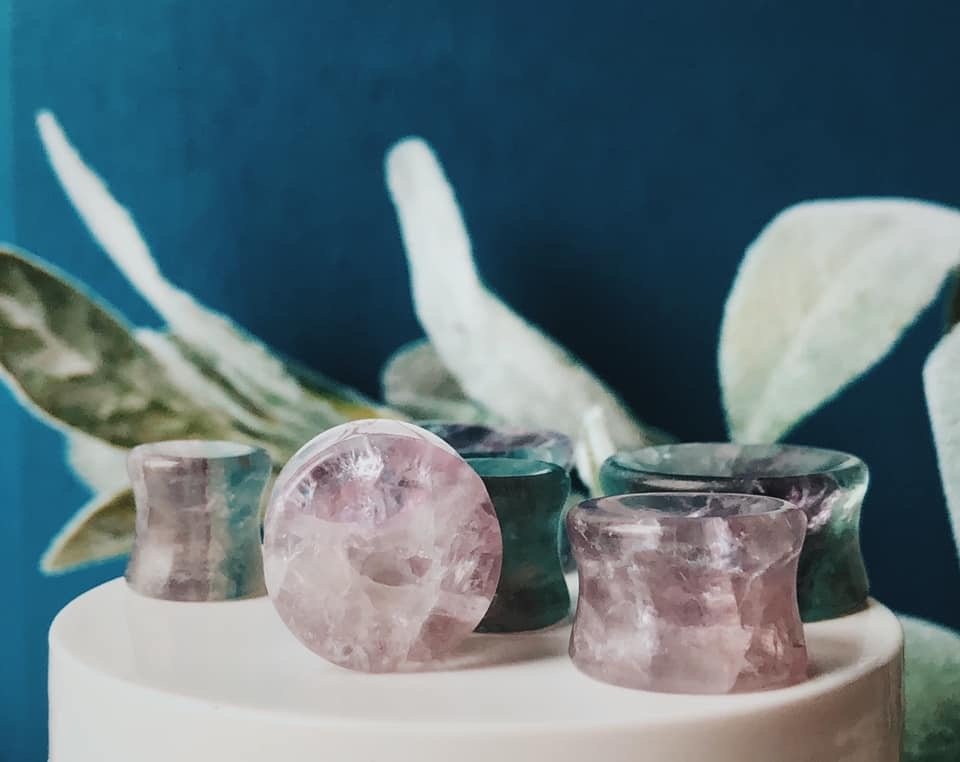
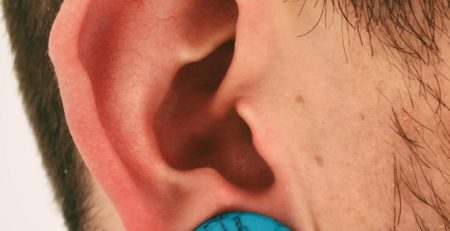
- There are many different materials that plugs are made of. Titanium, steel, wood, glass, stone, silicone, acrylic are just some of the options. When shopping for plugs, keep in mind that – Wood plugs have to moisturized with Jojoba Oil to prevent them from cracking and can’t be worn in the shower. Metal plugs can get cold quicker in the winter months.
What To Do in Between Stretches
Keep your ears clean. It’s easiest to take your plugs out in the shower and wash your ears with glycerin soap and warm water. You can also use lavender oil to keep things smelling good. Use a drop or 2 and rub onto plugs before putting them back into your ears.
Apply 2-3 drops of jojoba oil to your ear lobe and massage gently.
You can use ¼ teaspoon of our “Soak It!” sea salt mixed into 1 cup of warm water and soak your lobe for 3-5 minutes. You can do this with your plugs in and out. We do not suggest soaking with wood, bone, or horn plugs, or plugs that have decorative pieces inlaid, in your piercing as these natural materials can absorb water and be damaged.
What’s that Smell?
If you start to smell a little something, you’re not on your own. Plugs, and the piercing, can start to smell if they’re not cleaned regularly. The smell is caused by natural discharge from your body.
To help prevent the smell, we recommend taking your plugs out in the shower and washing with “Wash-It!” glycerin soap and water. You can also use our sea salt and soak your ears for 3-5 minutes with ¼ teaspoon of salt mixed into 1 cup of warm water. On top of these things, you can also use lavender oil. You can put this on your plugs to keep them smelling fresh!


Leave a Reply